Battle report of second Union assault on Fox’s Gap played on 11-12 February 2019.
Having refought with Chris and Steve the first assaults on Fox’s Gap and Turner’s Gap during the Battle of South Mountain, this continues the story of the Union attempt to break through at Fox’s Gap.
With Cox’s Kanawha Division worn out and retiring, IX Corps commander Major General Jesse Reno was desperate to break through the stubborn Rebels. With enough daylight left for only one major attack, Reno personally led the second assault, made by the 2nd Division brigades of Brigadier General Samuel Sturgis and Brigadier General Edward Ferrero.

Fox’s Gap – Reno leads the second attack by the brigades of Sturgis, on the left, and Ferrero
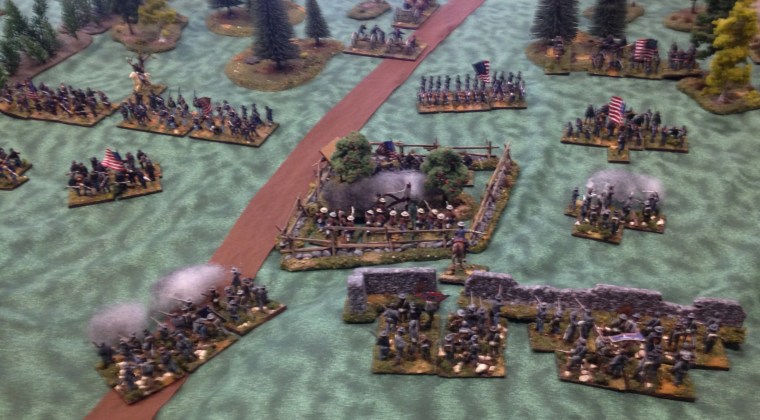
Sturgis advanced against Garland’s North Carolinians from Daniel Hill’s division, who still defended the stone wall along the ridge and had also sent the 12th North Carolina forward to hold the Daniel Wise farm. Ferrero marched confidently against Anderson’s much weakened brigade still holding the heights on the other side of the Old Sharpsburg Road through Fox’s Gap and praying for help.
Feeling out on a limb, the 12th North Carolina began falling back in confusion when fired on by the advancing 2nd Maryland led by Reno. To support the 12th, the 20th North Carolina then charged off the ridge at the 6th New Hampshire.
As Ferrero advanced, the 21st Massachusetts drove the remains of the Jeff Davis artillery from the field, leaving the 4th North Carolina standing alone to defend the Confederate position.

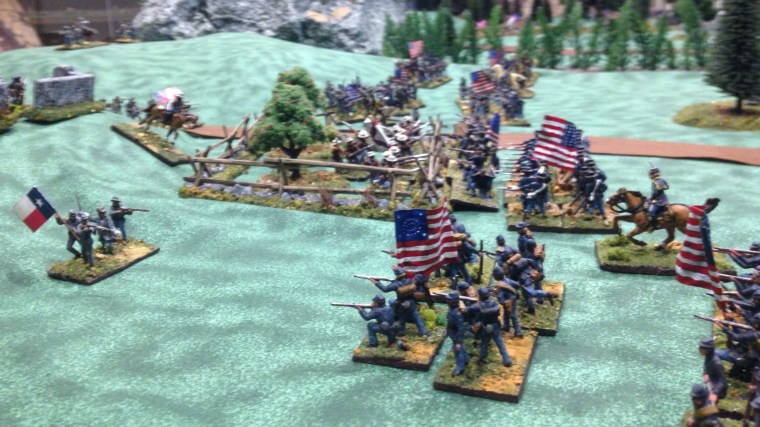
Fox’s Gap – Attack on the farm while the plucky 4th North Carolina holds on alone
With their charge shot to a halt, the 20th North Carolina began exchanging volleys with the 6th New Hampshire, taking losses but driving them back a little. The 12th North Carolina couldn’t stop the 2nd Maryland led by Reno pressing into the farm, but then gathered their courage and bested them with the bayonet, Reno falling mortally wounded in the fight!
Fox’s Gap – Reno falls in the fight for the Wise farm while at left the 23rd North Carolina advances
Meanwhile the 23rd North Carolina had moved down onto the road to assist the beleaguered 4th North Carolina. Their fire and attack broke the charge of the 21stMassachusetts, but came too late to stop Anderson’s brigade melting away. Finally though the Confederates gained some respite with the hard marching veteran brigade of John Bell Hood starting to arrive on the field.

Fox’s Gap – Hood’s brigade arrives as the fight around the farm intensifies
Fox’s Gap – The battered 20th North Carolina retires but the Union are thrown out of the farm
The loss of Reno had hampered Union morale but the fight was far from over. Standing alone against Ferrero’s brigade to buy time for Hood to arrive, the 23rd North Carolina disdained the fire of the larger 51st Pennsylvania, then charged them and drove them back into the woods.
Fox’s Gap – Final attack, across the road the 23rd North Carolina stands against Ferrero
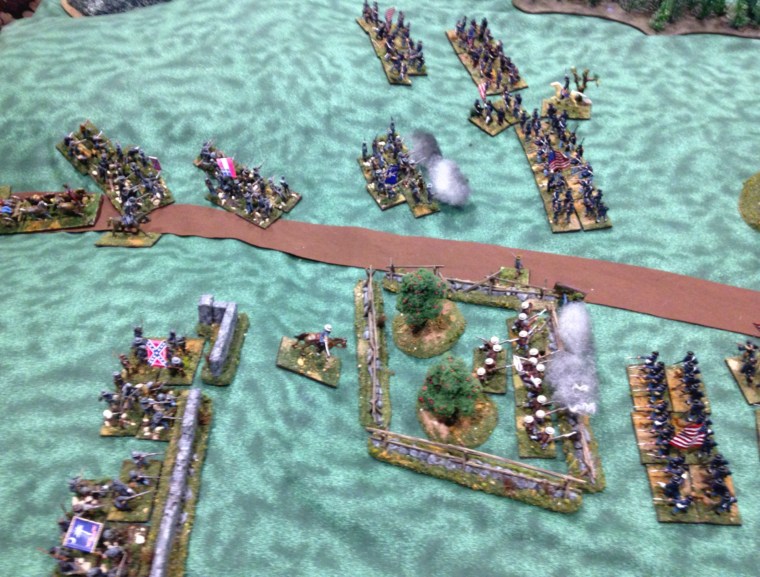
With a fresh Union effort the fight continued in earnest for Wise’s farm. In a last attempt to take Fox’s Gap Ferrero swung his men up onto the ridge to attack Hood before his brigade was able to fully deploy.

Fox’s Gap – Final attack, the fight for the farm continues while Ferrero attacks Hood’s arriving brigade
The downhill charge by the 51st New York so surprised the 4th Texas that they fell back in disorder, before reforming and going in hard, driving the 51st New York back over the crest with the bayonet.
The 12th North Carolina still held the farm against mounting pressure, which was just as well as the gallant 23rd North Carolina was shot to pieces and driven back to it!

Fox’s Gap – Final attack, while the 51st New York charges down the ridge, the remains of the 23rdNorth Carolina are shot back to the farm
The Union charges were all held and Garland’s much worn brigade repeatedly held on in good order until accumulated losses finally tipped it over the edge and they beat a hasty retreat, though even then the 5th North Carolina stayed long enough to repel one last Union charge, made against the wall.
Though Garland had finally been beaten his brigade had done enough, and he had lived a charmed life being repeatedly exposed to enemy fire and not suffering a scratch. Sturgis took the farm but with darkness falling hadn’t secured the heights, which elements of Hill’s brigade were now climbing to oppose him.
Ferrero’s attack had also failed in the descending gloom. After a parting volley, delivered at Hood’s Texans, Ferrero’s brigade quit the ridge and fell back to the woods.

Fox’s Gap – Final attack, Ferrero retires to the woods and while Garland retreats, Hood advances
Wrap Up
While different in detail, our refight reflected the historical outcome. As night fell our Union attack had finally captured Wise’s farm, but petered out with Hood still holding Fox’s Gap for the Confederacy.
While they had inflicted heavy losses on Reno’s IX Corps, the Rebels had taken significant losses as well and would have been hard pressed to stop any renewed assault the next morning.
This was a useful exploration of an important battle that has been completely overshadowed by the pivotal clash, it helped to shape, which took place three days later at Sharpsburg/Antietam.