
Been a while between drinks for these guys, but I have now started working on the third squad.


The NCO (1)

The NCO (2)

SMG 1

SMG 2

SMG 3


Tomorrow the Bren gun crew.
Been a while between drinks for these guys, but I have now started working on the third squad.
The NCO (1)
The NCO (2)
SMG 1
SMG 2
SMG 3
Tomorrow the Bren gun crew.
Imagine a skirmish system so fast and exciting that even a cheetah would take notes! Brethren is all about being Fast, Fun, and Ferocious—it’s like a rollercoaster of chaos where you can dive in without needing a PhD in game mechanics. Whether you’re a fresh recruit or a battle-hardened veteran, you’ll find that the rules are simpler than your toddler’s bedtime story, making it easy to jump right into the action. Get ready for a wild ride where strategies change faster than you can say “gotcha!” With each clash, your adrenaline will spike as teams go head-to-head, ensuring that every moment is more enjoyable than finding an extra fry at the bottom of the bag!

The rules are cleverly crafted to make wargaming possible for the busy bees among us—students, professionals, and parents who are basically juggling flaming swords while riding a unicycle. Coordinating games can feel like trying to herd cats while managing work and personal chaos, and let’s be honest, that’s about as fun as a trip to the DMV. Enter Brethren, the superhero of tabletop games, swooping in to save the day by simplifying setup and gameplay, allowing battles that feel epic without sending you into a stress spiral. With flexible timeframes and mechanics that adapt like a chameleon at a party, Brethren fits into your schedule tighter than your skinny jeans after the holidays, creating a delightful community for those just trying to survive the week. This game is the answer for all us passionate players craving some fun amid the delightful madness of life. Perfect for a mid-week escape from reality!
This flexibility makes Brethren an ideal choice for both casual players looking for a rapid battle and dedicated gamers eager to explore deeper tactics in a fuller session, making it not just a game, but a versatile tool for enjoyment that can adapt to any player’s needs or schedules.
The rules are broken up into distinct phases:
The Priority Phase
During the Priority Phase players dice to see who activates one of their units (figures) first. Activation is determined each turn, not once for the game.
The Activation Phase
During the Activation Phase you choose a figure to move and complete all of its actions, Generally this is two, but some types of units have more activations.
A number of actions can be used these include:
No unit may use an action other than Wait twice in the same activation.
Close combat is initiated when units are in contact, and there are special rules for charges that fall short – in essence you any is more prepared and your fighting ability is diminished slightly.
When all units are activated the turn has ended.
The terrain rules are practical and feature a detailed 3D approach with guidelines for height advantage, ladders, and other factors affecting gameplay. This system enhances realism and deepens strategy, allowing players to creatively use the terrain, like having an archer climb a tree for better visibility in combat. It encourages critical thinking about positioning and exploring tactics, leading to more engaging gameplay. Using landscape elements makes the game enjoyable and offers opportunities for innovative strategies that can influence battle outcomes.
The game features sieges, adding strategic depth not often seen in rule sets, enhancing battle storytelling and historical understanding. A recruitment system allows you to equip figures with various choices, creating personalized armies that fit your tactical style. Each army has strengths and weaknesses that influence battle outcomes while maintaining balance. The mechanics ensure a fair environment where strategy is key, encouraging players to explore different tactics and enrich their experience.
The main difference from other rules lies in the unique Heroes Activation Phase, which adds an exciting strategic element to gameplay. During this phase, a hero can choose to activate as a single unit, utilizing their three distinct activations to perform various actions. Alternatively, they have the option to move any other unit located within a six-inch range, provided that this unit has not already activated during the current turn. This flexibility allows players to carefully plan their moves, either maximizing the hero’s own actions or supporting other units on the battlefield that may require timely repositioning or engagement.
I am a big fan of these rules.
I just wrapped up the second book of Lamirande’s Pacific War alternate history, and let me tell you, it’s a real page-turner! Well page scroller anyway! In this version of reality, Japan decided that their battleships were more than just fancy floating tea kettles. Instead of babying them like they’re on a military “what not to lose” list, they’re unleashing a cannonball fiesta that would make any pyrotechnic show jealous. Who needs wisdom when you can just blow things up, right?
This new Japanese reality is like a bad sitcom, complete with challenges that make the Empire look like it’s reached its operational limit in the Pacific theater. With a better start and a slightly less questionable strategic position, Japan could’ve pulled off some impressive war moves, but let’s be honest, it still wouldn’t have been enough to mask its shortcomings—like production capabilities that were more “small shop” than “industrial powerhouse,” defending a territory so vast it could make Google Maps cry, or the small detail of picking a fight with the biggest industrial giant on the planet and really ruffling those feathers with their not-so-subtle Hawaiian Invasion antics.
The story takes a hilariously chaotic detour from the historical timeline of the first book, like a tourist who’s accidentally wandered into a bizarre themed amusement park! Key locations include Burma, Southern China, Australia, the Coral Sea, and the perpetually sunny yet mysteriously windy American West Coast, where even the tumbleweeds are rolling with laughter. If you’re into naval battles, then buckle up, because you’re diving headfirst into a delightful nostalgia trip featuring those massive dreadnought battles of the Great War—complete with popcorn and a front-row seat!

Get ready for some high-flying mischief as we tag along with our not-so-average pilots, Harry Bergman and Takashi Onishi, in their air battles! Meanwhile, on the ground, we get a front-row seat to the shenanigans of Imperial soldier Ishiro Tanaka (spoiler: he’s definitely not winning any “Nice Guy” awards), mixed in with some juicy historical tidbits from MacArthur’s writings and the wild tales of Tameichi Hara. And let’s not forget the submarine antics featuring the Wahoo and its fearless captain, Jim Cloutier—who probably has a “do not disturb” sign on his door for good reason! Plus, we’ve got the legendary Yamamoto, Roosevelt, and a parade of other characters who all have a say in the chaos of war.
This book was such a literary leap above the first one that it probably requires a parachute! With an action-packed focus on brawls, logistics, and an invasion of Australia—because who wouldn’t want to visit the land of kangaroos and BBQ?—it’s a real page-turner. But wait! The Japanese war machine seems to be tuning into a slow-motion saga, thanks to some epic supply line misadventures and the Americans flexing their muscles. I guess they forgot that you can’t win a race on an empty stomach!
I enjoyed this one, but probably the two reads are enough for me.
Oops just noticed this unfinished battle report dating way back to February.

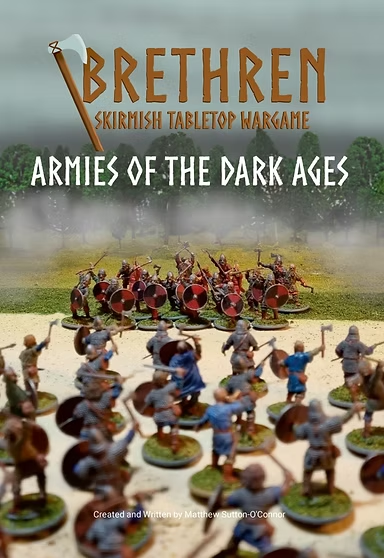
Wayne and I decided to have a game of “Brethren” a reasonably new set of Dark Age Skirmish rules.

A huscarl supporting my shieldwall is taken out by Wane’s long range bow fire

Next I lost one of my archers who was skirmishing in frontof my shieldwall.

Things were going from bad to worse as I lost another warrior who was supporting a huscarl.

Throwing caution to the wind the huscarl charged the end of the darstardly invaders shieldwall and took out their first casualty.

Another one of my warriors was downed by bow fire.

My huscarl was gradually taking out the invaders warriors one by one, as an opposing warrior tries to outflank him on the hill.

My general is attacked and promptly dispatches the would be giant killer.

The last of the enemy shieldwall is dealth with.

The battle had very quickly swung in my favour when all looked lost early. The enemy leader is dealt with sealing the invaders fate.

Brethren is very much like that. A single heroic event (code for good dice rolling) can cause chaos in your opponents rnks and turn the tide quickly. Make no mistake this was a game where I grabbed victory from the jaws of defeat. Wayne was as unlucky as I was lucky.
I really like this game even when I lose!
I have been looking around for a while for some “cheapish” figures to build a WW2 German Pioneer platoon for Bolt Action V3. Fortunately Victrix have just produced this “not-so-little” gem for AU$80.00.

This is a huge set , with 14 unique body designs, and 28 unique heads!

The set lets allows you to build a whole platoon with supports. including:

I am really impressed and am looking forward to putting them together to go with my Pioneer vehicles completed way back in late 2023!


This e-book I bought on Amazon presents an alternative history of the Pacific war. Max Lamirande skillfully alters some key facts in the real timeline and explores the outcomes of those changes.
At the outset I need to say that I love alternative history, especially military history, but it needs to be done right.

Lamirande uses simple descriptions of different events, along with stories, diaries, and quotes, to tell an engaging tale, but a number of issues detracted from this.
Lamirande’s writing suffers from a notable lack of detail that left me wanting more. Additionally, his use of individual characters to advance the story, which was a great idea, feels underdeveloped and weak, resulting in a lack of emotional connection to the narrative and its unfolding events. This is exacerbated by his lack of knowledge and/or research on much of the military equipment on which he makes some glaring errors. This is just plain sloppy penmanship. The sloppiness continues with the book riddled with grammatical and spelling errors throughout. For me all of this took away from my reading enjoyment.
I have the second book in the series to read. If it’s like the first, I probably won’t buy the third.
Will need to improve.
Zombie RV is available on Wargames Vault for US$0.00 yes folks that’s nought, zero, nuddah! It is just as enjoyable as Dave Bezio’s other “nuddah” Games Mini Medieval, Shooting Iron, Mice at Arms, Four Delvers, and Saddle Bum (a revision of Shooting Iron). I quite like Shooting Iron.

ZRV is a wildly fun game that’s become a fast favorite of mine for a good reason! Picture this: you’ve got 20-30 zombies shambling around, some brave (or maybe just reckless) survivors, and an RV that you can whip up from foam (I use a diecast 1/43 scale one), because who needs a real one when you can channel your inner craft guru?

It still needs to be Zombied up!
Trust me, you’re in for a riot of laughs and nail-biting moments! The game features a fantastic mechanic where zombies just can’t resist the siren call of survivor noise—like moths to a flame, or dogs to a squeaky toy! This means survivors have to channel their inner action hero and splat those zombies before they realize you’re only hunting for snacks and supplies. Combat is a breeze, involving d6 rolls for hitting and damage, perfect for both newbies and old-school gamers who still wear their D&D T-shirts with pride.
The glorious 10-page rulebook has everything you need to get the party started, along with 4 scenarios that are like warm-up exercises for your imaginative brain. Each scenario is a blast on its own and leaves plenty of room for you to unleash your wild house rules—let’s be honest, who doesn’t want to create a “Dancing Zombie” rule? The game’s mix of flexibility and hilarity ensures every session is a fresh slice of zombie-filled fun. And at a price that’s almost too good to be true, it’s practically begging you to jump in! Highly recommended for anyone who’s looking to have a rollicking good time while outsmarting the undead, which I know would be a real challenge for a lot of Wargamers!

There is also a mini-campaign add-on that is the ultimate in Zombie games. Yep that’s right folks Zombie Clowns.

I have an Uncle Honk that I now have no excuses for not painting……………drats!
Super simple and fun! This delightful little gem is just 10 pages long—because who needs a novel when you can have 6 pages of rules and 4 scenarios that could end in your untimely demise? It’s so entertaining it’ll practically have you rolling on the floor, but beware: it’s deadlier than your average houseplant, adding a touch of adrenaline to your game nights. With a small footprint, it’s perfect for those cramped spaces where even your sock drawer looks like a mess, and you can play on a cozy 2×2 board that’s as compact as your will to live after making a bad decision! The rulebook is so well-organized and user-friendly, it’s almost like it’s holding your hand while you trip over the rules. Plus, its straightforward mechanics make it easy to play solo—so whether you’re plotting world domination or just trying to entertain yourself, you can dive into this thrilling escapade at your own charmingly slow pace!
Drew and I finally were able to fit in a game before he travelled North and then back to Thailand. A game of “Rebels and Patriots” was agreed on. We played the Attack at Fort Glory scenario,

The British Defending Fort Glory

Having not played the rules for a long time we played a few things wrong:
1. There are no free actions for anyone so every action a unit is allowed to do must be diced for. Page 21. With Drew’s dice rolling this would have made it even harder for him!
2. There is a long range anything over 12″ requires one extra hit. Page 29 removing casualties. Rarely was shooting over the 12″ due to the scenario set up.
3. Skirmishes always count as in cover. Page 29 removing casualties. This would have made the First Nations troops advance a lot easier.
4. Officers casualties 2x d6 -1 per casualty = 1 or less he is a casualty. Generally was not an issue.
5. Each casualty a unit does a Morale Test page 35 not page 34 which is part of the rally test. So it is-1 per casualty and disorder marker + Officers leadership. A 2 or less the unit gains 2 markers not one,
6. There is no compulsory rally test unless broken – we generally played this right..
7. Although skirmishes shoot with 12 dice which we did correctly they only fight with half which we did not.
Too much time playing MWWBK’s confused us both. These changes certainly would have made the game a lot closer but Drew’s dice rolling was atrocious and probably would not have changed the end result.

Indian skirmishers move toward the forts main gate, minus 5 of their colleagues who have fallen.

French regulars in the forest.

Indians getting felled along with the tree

Only one of the British Indian allies left.

Indians advance in Skirmish order

French line fail their casualty test.

The British still holding firm inside Fort Glory

The French roll snakes eyes and run from the field.

French Indian allies in a lot of trouble as the advance across open ground.

The Indians allies passed their rally test and retreated into the internal block house. The were replaced in the gatehouse by a British Line infantry unit.

A French Indian Unit, on the far left, assaults the fort but is repulsed.

Another French unit disappears into the forest


The final French allies disappear leaving only one French line unit left when darkness falls.
A great game accept for Drew’s really bad activation, shooting, and morale tests!

On 22 October 1950, the 3rd Battalion, Royal Australian Regiment (3RAR) fought its first battle in Korea in an apple orchard north of Pyongyang, marking a significant moment in their military history. The orchard, lush and vibrant, soon transformed into a site of intense conflict as the soldiers faced their North Korean opponents. Just over a week after arriving in Pusan, where they acclimatized to the new environment and prepared for combat, 3RAR led the US-led advance into North Korea across the 38th parallel, demonstrating bravery and resilience. This operation not only tested their skills but also solidified their crucial role in the broader campaign, as they pushed forward into uncharted territory, facing various challenges along the way.

The UN led the Battle of Yongju, also known as the Battle of the Apple Orchard, to stop the North Korean forces during the Korean War. The US 187th Airborne Regimental Combat Team (US 187 RCT) was sent in front of the UN forces to the Sukchon and Sunchon drop zones. The Paratroopers sought to face retreating North Koreans, pushing them west and freeing American and South Korean POWs. The dropzones, about 25 miles north of the capital, were chosen for their locations, and the paratroopers faced little resistance when they were sent in.

Starting on October 20th, 1,470 paratroopers flew from Kimpo Airfield in C-119 and C-47 planes. While they faced little air resistance, there was occasional sniper fire. Despite some injuries and damage to weapons, the Airborne drop was successful, and the US 187 RCT continued its mission to advance south toward the capital.

Unfortunately, while on the ground, the Americans met a heavy attack dealt by the North Korean 239th Regiment, which was expertly trained and well-prepared for combat. This aggressive maneuver caught the U.S. forces off-guard, as they had anticipated a different line of engagement. As the battle unfolded, additional help arrived for the North Koreans, including artillery support and reinforcements that intensified the conflict and overwhelmed American positions, leading to a chaotic and desperate situation on the battlefield. The rapid escalation of violence not only tested the resolve of the troops but also put significant strain on their resources and strategic plans.

While under attack, the 27th British Commonwealth Brigade, consisting of the Australian 3RAR, the Argyll and Sutherland Regiment, and the Middlesex Regiment pushed the North Koreans back almost to the Manchurian Border. But when the Chinese entered the war on the side of the North Koreans, 3RAR played a major role in halting their advance, bravely set off to assist their comrades, skillfully crossing the Taedong River on their journey to reach Sukchon.

A US tank with 3 RAR support.
As the Allies arrived on the scene, the Australians launched a decisive attack, which prompted the North Koreans to retreat from their strategic position on the high ground. With the terrain advantage lost, the situation became tense as the North Koreans found themselves trapped between the advancing US paratroopers and their own forces. For three grueling hours, the two sides engaged in a fierce battle, with soldiers on both sides displaying remarkable bravery and perseverance amidst the chaotic exchange of gunfire and explosive sounds reverberating in the air. The North Koreans, despite being heavily outnumbered and outmaneuvered, refused to surrender and fought tenaciously. Ultimately, they were driven out from their positions by the relentless push of the Allied forces, allowing the Allies to reclaim control and meticulously clear the area of any remaining soldiers, ensuring that the threat was completely eradicated.

The figures are from Slave2Gaming and are from their Korean Range.
With American, British, and Australian fighters united for a common goal, the North Korean 239th Regiment was significantly defeated. While the North Koreans focused on the Americans in the north, the Australians launched a successful surprise attack from the rear. In that apple orchard, the Allies not only defeated their opponents, but the Australians also had a defining moment that highlighted their performance in action, preparing them for battles in the coming months.


These are the first of what will be a small 3RAR, “the old faithful”, Bolt Action force

The Slave to Gaming Korean figures are great quality and a lot cheaper than Eureka Miniatures and Warlord Games figure, and are specifically Korean with the correct shirt cuffs.

I started with a cutout piece of high density grey foam.

The hill was then cut out to shape using a hot wire cutter.

A wire brush was used to “scour the hill surface to represent a “grassy” surface.

A close up of the scoured surface

The hills were then painted with various “rattle cans”.

Unlike the lower density yellow foam the grey foam takes the paint very well and you are able to achieve great coverage with little spray.

A two tier steep hill or a small and a large low hill.

Another steep hill.

Two medium hills.

Hopefully a Rebels and Patriots Battle Report tomorrow.